Servlet - 1일 차 수업
Servlet ( 자바 서블릿 )
정적인 웹페이지를 동적으로 생성하는 서버측 프로그래
서블릿 수업할 서버 설치 및 서버실행
html언어 뿌려보기
어제한 수업
html
인코딩방식 브라우저에 알려주기
브라우저가 못알아먹어서
request.getParameter
오늘 수업
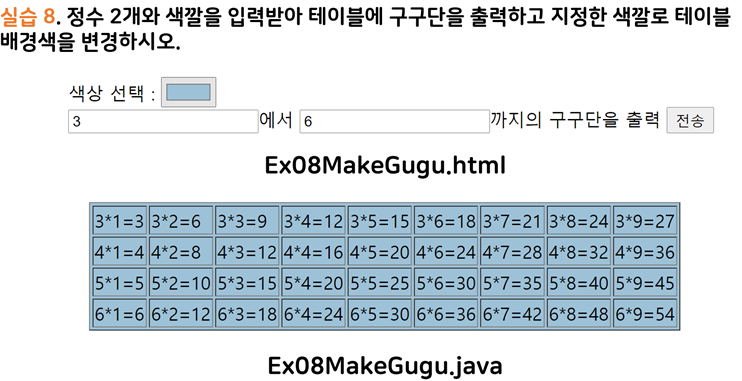
1. input 타입 컬러 값 넘겨서 서블릿에서 색변경하기
<!DOCTYPE html>
<html>
<head>
<meta charset="UTF-8">
<title>Insert title here</title>
</head>
<body>
	<form action="Ex07MakeGugu">
		색상 선택 : <input type="color" name="color"><br>
		<input type="text" name="num1">에서
		<input type="text" name="num2">까지의 구구단을 출력
		<input type="submit" value="전송">
	</form>
</body>
</html>
*Ex07MakeGugu.html 코드
package com.smhrd.servlet;

import java.io.IOException;
import java.io.PrintWriter;

import javax.servlet.ServletException;
import javax.servlet.annotation.WebServlet;
import javax.servlet.http.HttpServlet;
import javax.servlet.http.HttpServletRequest;
import javax.servlet.http.HttpServletResponse;


@WebServlet("/Ex07MakeGugu")
public class Ex07MakeGugu extends HttpServlet {
	private static final long serialVersionUID = 1L;


	protected void service(HttpServletRequest request, HttpServletResponse response)
			throws ServletException, IOException {
		String color = request.getParameter("color");
		int num1 = Integer.parseInt(request.getParameter("num1"));
		int num2 = Integer.parseInt(request.getParameter("num2"));

		PrintWriter out = response.getWriter();
		out.print("<html>");
		out.print("<body>");
		out.print("<table bgcolor='"+color+"' border='1'>");
		for (int i = num1; i <= num2; i++) {
			out.print("<tr>");
			for (int j = 1; j <= 9; j++) {
				out.print("<td>"+i+"*"+j+"="+(i*j)+"</td>");
			}
			out.print("</tr>");
		}
		out.print("<table>");
		out.print("</body>");
		out.print("</html>");
	}

}
*Ex07MakeGugu.java 서블릿 코드
추가실습.
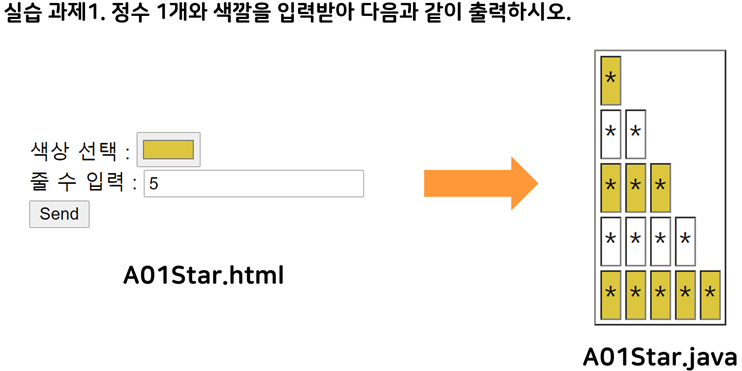
** A01Star.html
<!DOCTYPE html>
<html>
<head>
<meta charset="UTF-8">
<title>Insert title here</title>
</head>
<body>

	<form action="A01Star">
		색상 선택 : <input type="color" name="color"><br>
		줄 수 입력 : <input type="text" name="num1"><br>
		<input type="submit" value="전송">
	</form>
</body>
</html>
** A01Star.html
package com.smhrd.servlet;

import java.io.IOException;
import java.io.PrintWriter;

import javax.servlet.ServletException;
import javax.servlet.annotation.WebServlet;
import javax.servlet.http.HttpServlet;
import javax.servlet.http.HttpServletRequest;
import javax.servlet.http.HttpServletResponse;

@WebServlet("/A01Star")
public class A01Star extends HttpServlet {
	private static final long serialVersionUID = 1L;

	protected void service(HttpServletRequest request, HttpServletResponse response) throws ServletException, IOException {
		String color = request.getParameter("color");
		int num1 = Integer.parseInt(request.getParameter("num1"));

		PrintWriter out = response.getWriter();
		out.print("<html>");
		out.print("<body>");
		out.print("<table border='1'>");
		for (int i = 0; i < num1; i++) {
			out.print("<tr>");
			String tdColor = "";
			if(i % 2 != 0) tdColor=color;
			for (int j = 0; j <= i; j++) {
				out.print("<td bgcolor='"+tdColor+"'>*</td>");
			}
			out.print("</tr>");
		}
		out.print("<table>");
		out.print("</body>");
		out.print("</html>");
	}

}
2교시 데이터 전송 방식의 개념
학습 목표
1) 데이터 전송 방식(Get/Post)을 이해한다.
2) requset와 response 객체를 사용하여 요청처리와 응답을 할 수 있다.
새로운 프로젝트 생성 - Servlet2
** 실습내용 - 서블릿 사용시 웹브라우저에 인코딩 해주기
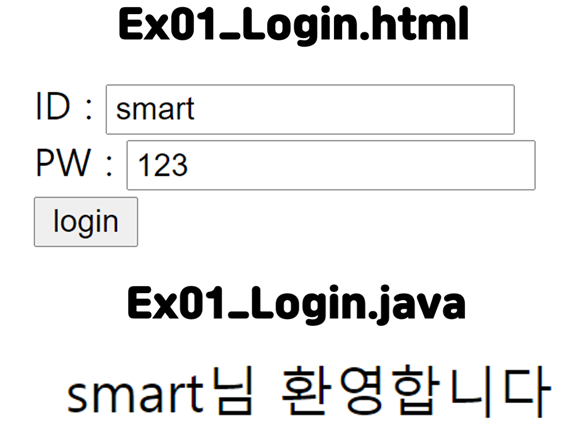
** Ex01Login.html
<!DOCTYPE html>
<html>
<head>
<meta charset="UTF-8">
<title>Insert title here</title>
</head>
<body>
	<form action="Ex01Login">
		ID : <input type="text" name="id"><br>
		PW : <input type="password" name="pw"><br>
		<input type="submit" value="login">
	</form>
</body>
</html>
** Ex01Login.java
package com.smhrd.selvlet2;

import java.io.IOException;
import java.io.PrintWriter;

import javax.servlet.ServletException;
import javax.servlet.annotation.WebServlet;
import javax.servlet.http.HttpServlet;
import javax.servlet.http.HttpServletRequest;
import javax.servlet.http.HttpServletResponse;


@WebServlet("/Ex01Login")
public class Ex01Login extends HttpServlet {
	private static final long serialVersionUID = 1L;


	protected void service(HttpServletRequest request, HttpServletResponse response) throws ServletException, IOException {
		String id = request.getParameter("id");
//		String pw = request.getParameter("pw"); // 사용을 안해서 딱히 안써도 된다

		// 영어나 숫자는 상관이 없으나 한글은 그냥 전송시 깨지기 때문에
		//      인코딩을 해주어야 하기때문에 인코딩 지정방식 전송이 필요
		// 1. 응답 문서에 대한 설정 - 웹브라우저에 보낼 객체에 인코딩할 방식을 담아줌
		response.setCharacterEncoding("UTF-8");

		// 2. 웹브라우저에 보낼 객체에 컨텐츠 타입이 text 이고,
		// 인코딩 방식은 UTF-8이라고 알려주는 값을 담음
		response.setContentType("text/html; charset=UTF-8");

		// 컨텐츠에 뿌려질
		PrintWriter out = response.getWriter();
		out.print("<html>");
		out.print("<body>");
		out.print("<h2>"+id+" 님 환영합니다</h2>");
		out.print("<body>");
		out.print("</html>");
	}

}
HTTP Protocol Method 종류 별 용도
* GET - 데이터 조회 요청
* POST - 데이터 생성 요청
* PUT - 데이터 수정 요청
* DELETE - 데이터 삭제요청
GET
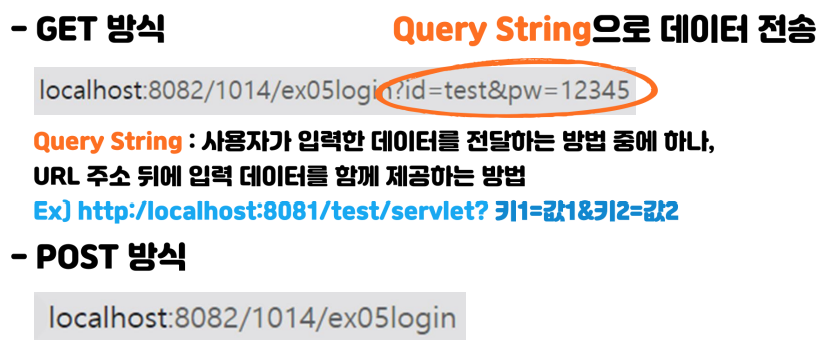
- URL 에 데이터를 포함시켜 요청한다.
- 데이터를 패킷의 Header에 포함하여 전송한다.
- 전송하는 데이터의 길이에 한계가 있다. (브라우저에서 제한한다)
- 보안에 취약하다.
- 캐싱할 수 있다. ? 응답값을 로컬 컴퓨터에 저장
- form 태그에서 method값을 지정하지 않을 때 기본값으로 지정된다.
POST
- URL에 데이터를 노출하지 않고 요청한다.
- 데이터를 패킷의 Body에 담아서 전송한다.
- 전송하는 데이터의 길이에 제한이 없다.
- 보안에 강하다(get 방식보다) => 보내는 데이터가 눈에 보이지 않기 때문에
- 캐싱할 수 없다.
Ex02GetPost.html 생성
** Ex02GetPost.html
<!DOCTYPE html>
<html>
<head>
<meta charset="UTF-8">
<title>Insert title here</title>
</head>
<body>
	<!-- Get방식
		1. url에 데이터를 담아서 전송
		2. 데이터 길이에 제한
		3. 데이터가 url에 노출이 되기때문에 보안에 취약
		4. post방식보다 속도가 빠름
		5. method를 따로 지정하지 않으면 기본값 -->

	<form action="Ex02GetPost" method="get">
		NAME : <input type="text" name="name">
		<input type="submit" value="Get">
	</form>
</body>
</html>
**Ex02GetPost.java
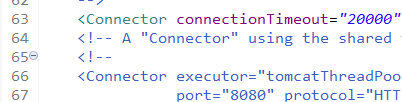
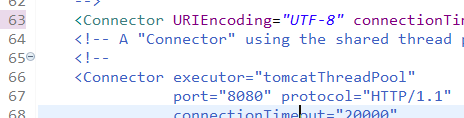
원래는 GET방식일 때 쿼리 스트링 부분도 인코딩 해주어야 한다.
하지만 상위버전인 톰캣이기 때문에 안해주어도된다.
알아서 잘됨...

get방식 노출하겠다.
post자체가 숨겨서 가겠다.
바디안에서 갈때 요청방식을 원하는 방식으로 지정해야 한다.
웹방식이든 인코딩 방식이든 알려줘야 한다.
**